
Supplies Needed
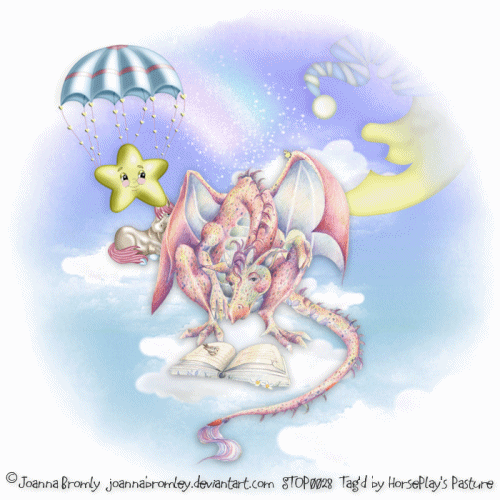
1 tube of choice – I used the wonderful artwork of Joanna Bromley which can be purchased from PSP Tube Stop. You must have a license to use. The artwork of this tube inspired me to make the kit and can be purchased together for a great savings at PSP Tube Stop.
Font of choice – I used LD Funky Scribble - a pay font. Childish should work just as nice here
Monti Circular Mask here
Plug Ins used:
DSB Flux - Bright Noise
Animation Shop
"A Dragon's Dreamy Day" is a tagger size scrap kit created by me, Bev of HorsePlay's Pasture Designs and can be purchased from any of my stores here.
~♥~ Let’s get started ~♥~
Open up a 700 x 700 blank canvas.
Flood fill white.
New Raster layer.
Select All
Copy and paste Paper 5 Into Selection.
Deselect.
Apply the mask.
Merge Group.
Duplicate
Change the Properties to Multiply
Don't close the mask out. You'll be using it again.
Copy and paste your tube as a new layer.
If you're using the same tube as I did, resize 70%
Copy and paste EL49 as a new layer.
Move into position so that it looks as if the tube is sitting/standing on it.
See my tag for reference.
Duplicate/Mirror the cloud element if you need more cloud cover.
You can duplicate the original cloud layer and resize as you'd like if you want more clouds.
Add the elements. Don't worry about what overhangs the mask. We'll clean that up in a bit. I used:
El27: Resize 25%/Mirror
El34: Resize 70%/Free rotate Left 5 degrees
El47
El43: Resize 70%
Highlight the Moon layer.
Apply the mask.
Merge Group.
Highlight the Rainbow layer.
Apply the mask.
Merge Group.
You can close the mask out now.
Duplicate the rainbow layer twice for a total of 3 rainbow layers.
Rename them Rainbow 1, Rainbow 2, Rainbow 3.
Highlight Rainbow 1 layer.
Apply DSB Flux - Bright Noise:
Intensity: 10
Mix checked
OK
Close this layer out.
Open up Rainbow 2 layer.
Apply the same noise effect accept hit the mix button twice.
OK
Close this layer out.
Open up Rainbow 3 layer.
Apply the same noise effect accept hit the mix button 3 times.
OK
Close this layer out.
Reopen Rainbow 1 layer.
Copy and paste EL32 as a new layer.
Mirror
Type each letter of your name, but keep it on a layer of it's own, and make change each layer to a Raster layer.
After you have all the letters of your name typed make your Pick Tool active by pressing the letter K on your keyboard.
Move the letters into position over the banner of the airplane turning the letters according to where they sit on the banner - see my tag for refernce.
After you've done that, Merge Visible all the letters in your name.
Give it a drop shadow.
Merge Visible your name and the plane.
Rename this layer "Airplane"
Move this layer all the way to the left side of your canvas so all you can see is the propeller of the plane.
Close this element layer out.
Add your copyright.
Copy Merge.
~Time to Animate~
Open up Animation Shop.
Edit/Paste/As New Animation.
Back in PSP.
Close out Rainbow 1.
Open up Rainbow 2.
Copy Merge.
Carry into AS.
Edit/Paste/After Current Frame.
Back in PSP.
Close out Rainbow 2.
Open up Rainbow 3.
Copy Merge.
Carry into AS.
Edit/Paste/After Current Frame.
Ctrl + A to highlight all 3 frames.
Ctrl + C to copy all the frames.
Click your mouse on frame 3 only.
Edit/Paste/After Current Frame.
Click your mouse on Frame 3 again.
Edit/Paste/After Current Frame.
Click your mouse on Frame 3 once again.
Edit/Paste/After Current Frame.
Click your mouse on the very last Frame to highlight it.
Back in PSP.
Close out Rainbow 3.
Open up Rainbow 1.
Open up "Airplane" layer.
Copy Merge.
Carry into AS.
Edit/Paste/After Current Frame.
Back in PSP.
Move the plane a little to the right.
Close out Rainbow 1 layer.
Open up Rainbow 2 layer.
Copy Merge.
Carry into AS.
Edit/Paste/After Current Frame.
Back in PSP.
Close out Rainbow 2 layer.
Open up Rainbow 3 layer.
Move the plane a little to the right.
Copy Merge.
Carry into AS.
Edit/Paste/After Current Frame.
Keep repeating the above steps until the only part of the plane you can see is the very end of the banner.
After you've pasted all the frames press Ctrl + A to highlight all the frames.
Animation/Frame Properties:
Change it to 23
OK
(You can change the property number if you like. The bigger the number the slower the animation runs)
View your animation.
If you're happy with it then save.
I’d love to see your results.
Email me!
Hugs,
Bev
No comments:
Post a Comment