

Supplies Needed
1 tube of choice – I used the adorable artwork of Lisa Victoria which can be purchased from Up Your Art. You must have a license to use.
Font of choice – I used Black Boys on Mopeds here
Vix Mask 451 here
Stars Template by Brutal Designs here
You can find it under Tuesday, July 5, 2011
"A Dragon's Dreamy Day" is a tagger size scrap kit created by me, Bev of HorsePlay's Pasture Designs and can be purchased from any of my stores here.
~♥~ Let’s get started ~♥~
Open up the template.
Shift + D.
Close out the original.
Resize all layers 90%
Image/Canvas size
750 x 750
OK
Highlight the background layer.
Flood fill white.
Delete the top 3 layers, Zig Zag Line, and Teal Rec.
Highlight Grey Rec Top layer.
Click on it with your Magic Wand.
New Raster layer.
Copy and paste Paper 13 Into Selection.
Deselect.
Delete the template layer.
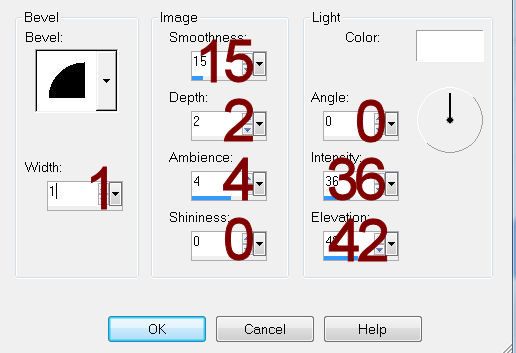
Give the paper layer a slight Inner Bevel:
Highlight Grey Rec Bottom layer.
Repeat the above step.
Highlight Dk Grey Rec Top layer.
Click on it with your Magic Wand.
New Raster layer.
Open up Paper 11/Flip/Copy and Paste Into Selection.
Deselect.
Give the paper the same slight Inner Bevel.
Highlight Dk Grey Rec Bottom layer.
Repeat the above step.
Copy and paste El25 as a new layer.
Resize 70%
Duplicate
Move each frame layer over Blk Circle Top layer and Blk Circle Bottom layer.
Delete the template layers.
To each frame:
Click inside of it with your Magic Wand.
Selections/Modify/Expand by 4.
New Raster layer below the frame.
Copy and paste Paper 11 Into Selection.
Deselect.
Delete the template layer.
Highlight Teal Oval layer.
Click on it with your Magic Wand.
New Raster layer.
Copy and paste Paper 17 Into Selection.
Deselect.
Delete the template layer.
Give it the same slight Inner Bevel.
Highlight Teal Noisey Oval Frame layer.
Use your Target Tool and change the color of it to #a88eb5.
Highlight Blk Oval layer.
Click on it with your Magic Wand.
New Raster layer.
Copy and paste Paper 5 Into Selection.
Copy and paste your tube as a new layer.
Change the Properties of the tube to Soft Light and lower the Opacity to about 46.
Move the tube into a position you like.
Selections/Invert
Tap the delete key.
Copy and paste El47 as a new layer.
Move into a position you like.
Tap the delete key.
Deselect.
Delete the template layer.
Copy and paste your tube as a new layer.
Copy and paste El33 as a new layer.
Resize 85%
Copy and paste EL29 as a new layer.
Resize 20% and 80%
Move into position - see my tag for reference.
Duplicate - move this layer below the air baloon in your layers pallet.
Highlight the original Elephant layer.
Use your Eraser Tool and erase the lower part of the elephant so it looks like it's standing inside the balloon.
Merge Visible the air balloon and both elephant layers.
Add your elements. I used:
El70
El 30: Resize 70%/Mirror
El 12: Resize 50%
El 15: Resize 15%
EL 14: Resize 10%
El 72: Resize 70%
El 71: Resize 70%/Free rotate Right 10 degrees
El 49
El 9: Resize 40%/Free rotate Left 15 degrees/Duplicate/Mirror/Resize 70%
El 55: Resize 50%/Duplicate/Flip/Resize 70%
El 79: Duplicate
Highlight your white background.
New Raster layer.
Select All
Copy and paste Paper 1 Into Selection.
Deselect.
Adjust/Blur/Gaussian Blur:
Radius: 15
OK
Apply the mask.
Resize 110%
Merge Group.
Duplicate/Change the Properties to Multiply/Lower the Opacity to about 28.
Add your copyright.
Add your name:
Color Pallet:
Foreground: 000000
Background: Pattern/Paper 1 (Blur the same as you did for the mask)
Angle: 0
Scale 30
Stroke: 1.5
Type your name.
Give it a slight Inner Bevel:

Resize all layers 80%.
I’d love to see your results.
Email me!
Hugs,
Bev
No comments:
Post a Comment